| Gutefår 3112 |
Walibi Holland |
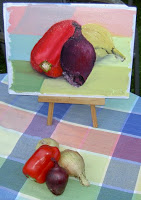
Jens Wet Panels Box
One year ago I started to paint with oil. Oil paintings stays wet much longer than both acrylic and aquarelle paintings. To make it possible to attend model sessions and also paint outdoor etc I had to create a method that works for me, so that I can go to a location and paint and when done pack my things and go home without the risk of spoiling the wet painting.
Many times standard panels for oil paintings are one and a half cm thick (almost an inch) and when I am painting many of these I would get a storage problem so the panels need to be thinner. You can buy thinner panels as well but I have tried to figure out an affordable system, compact and easy to use.
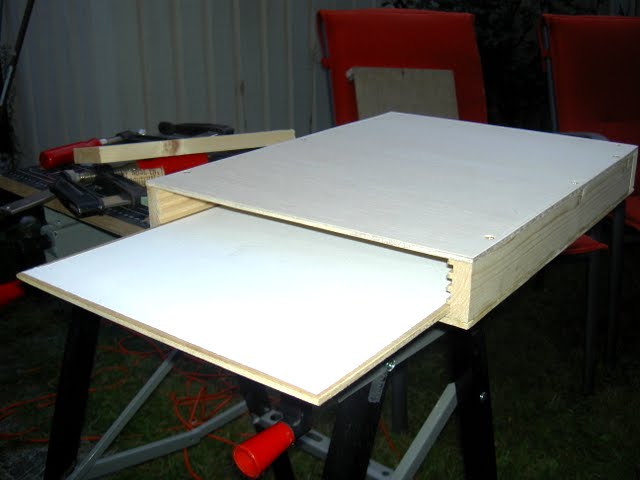
I create my panels from hardwood triplex 5 mm. At the DIY shop I they can saw the boards to any size and I get the most out of the boards if they are made into 30 by 40 cm panels. I prepare the panels with gesso. See other post about preparing panels. In this posting I will show you a box that I can use for storing and transporting the panels when they are wet: Jens Wet Panels Box.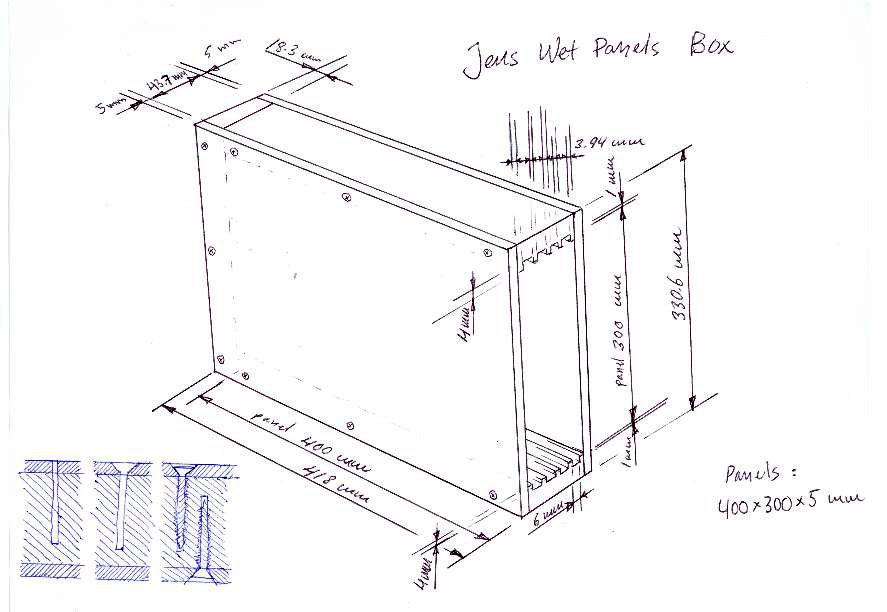
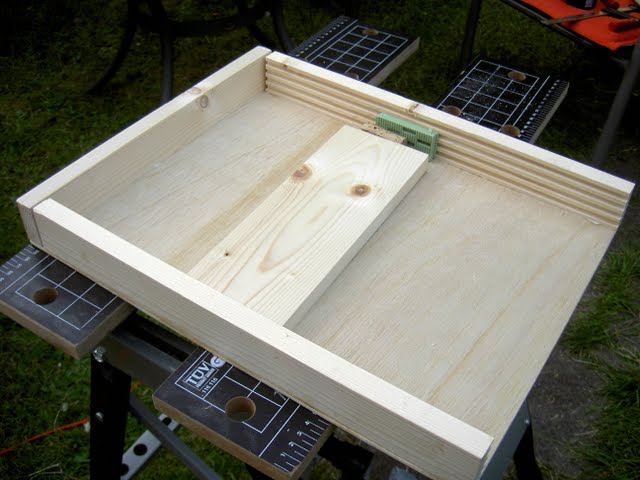
Here is schematic drawing of my box. It is very simple and it can be done in a various ways but this is how I decided to make it. I create the box for four panels. I make grooves in two wooden studs and put two side plates around these and one stud in the bottom. Based on the sizes of the studs used I came up with the measurements for this construction. I leave a gap of one millimeter on each side of the panel so that the panels will not get stuck in the box.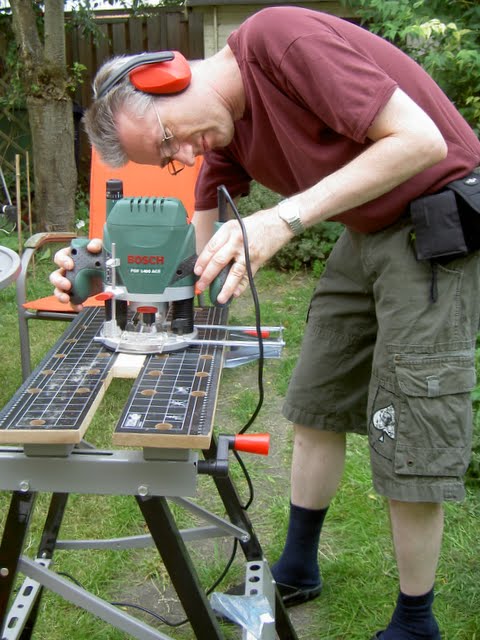
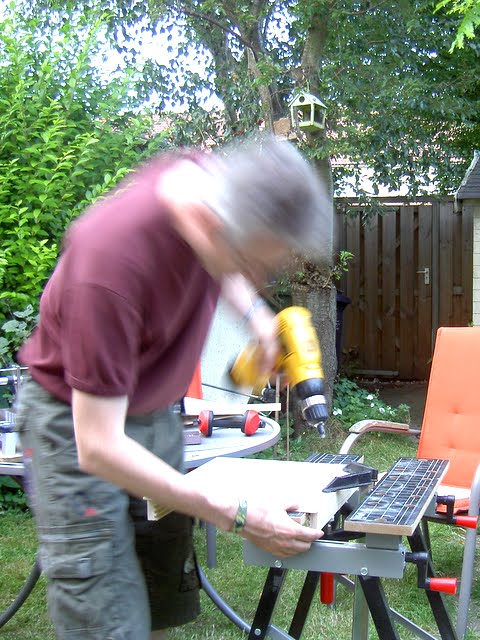
I use a router to create the grooves. I use a straight 6mm router bit in the router. I fixed the guides of the router carefully so that the groove will come at the correct place in the stud. The depth of the groove is 4 mm.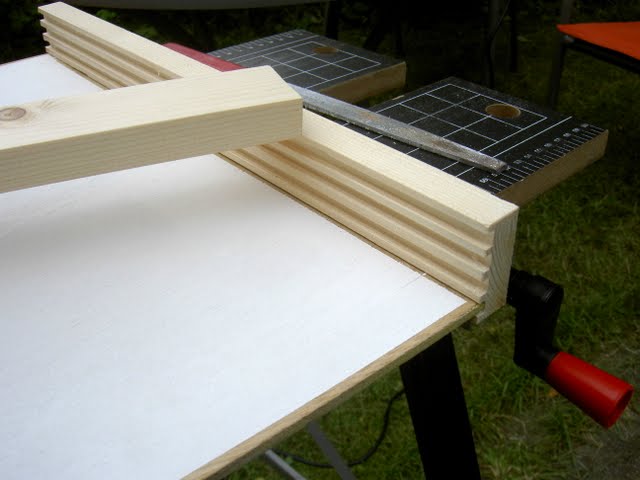
Here you can see a finished stud. In it is a test panel lying. I made the two studs symmetrically and when finishing the box I make sure that the grooves made are on the opposite side of each other. It is just a precaution. I measuring exact this is not necessary.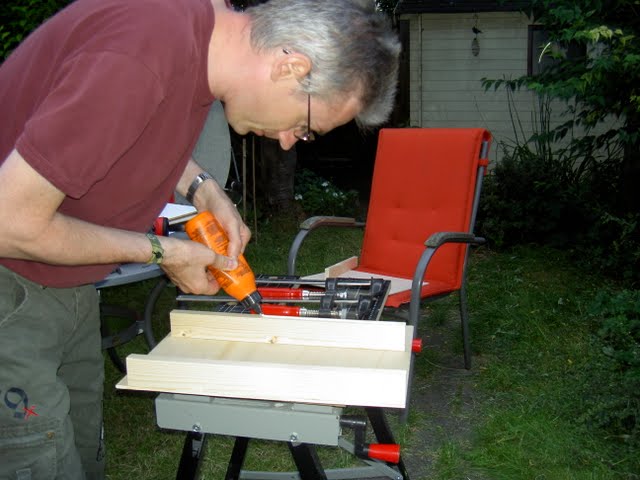
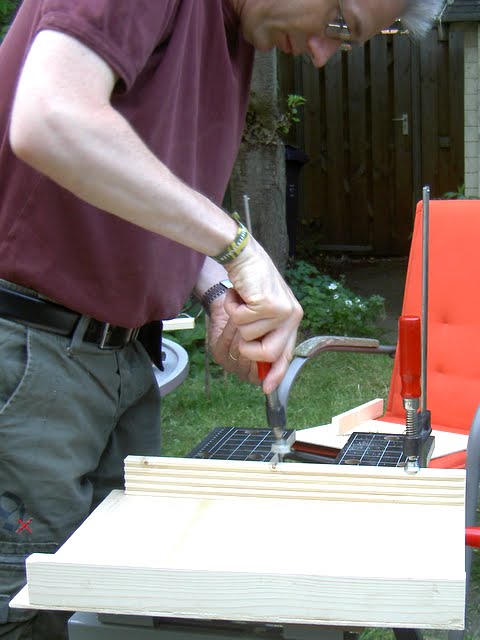
When preparing for the screws on the opposit side it is important to avoid screwing directly on an already present screw.


 Dusk You and I on 6 December 2018Josefin at the beginning of a new era of palette administrationThe environment is so boringPreparing hardwood plywood painting panelsHow much is a 'Jens Wet Panels Box'?This painting of Emily is imperfectly niceWill a painting of a canal a misty morning say “POF” and self-destruct?Aquarellish oil painting - SandrinaJens Relative Drawing RulerJens Proportional DividerThe proportional divider!
 I moved from Sweden to The Netherlands in 1995.
Here on this site, you find my creations because that is what I do. I create.