| Kimbal and Elisa 29 May 2016 |
Porting my blog for the second time, deployment part 2 |
Porting my blog for the second time, deployment part 1
This is post #53 of my series about how I port this blog from Blogengine.NET 2.5 ASPX on a Windows Server 2003 to a Linux Ubuntu server, Apache2, MySQL and PHP. A so called LAMP. The introduction to this project can be found in this blog post https://www.malmgren.nl/post/Porting-my-blog-for-the-second-time-Project-can-start.aspx.
It is time for deployment. I decided to stop hosting the blog at home on my own server. It is time for a server running in a proper server room. Actually I made the calculation that if I bought my own server and hosted it myself that would probably be around 2000 euro. Then that is the equivalent of eleven years worth of virtual private server. There are several options for this but I decided to make use of the same company I use for my domain names Argeweb bv. Logging in and ordering the vps was done in under a minute.
I ordered the following VPS:
- Ubunto 14.04
- 2 Gb internal memory
- 150 Gb of diskspace
- 2 cores processor
- 1 snapshot
- 15 Euro per month. Discount the first month.
At 9:36 PM came the order confirmation. At 9:49 PM came the login information. That is 13 minutes later!
Immediately I tucked all the logon information in my digital vault.
So I got all information but the IP number of my new server. Where can I find the IP number?
"IP-adres: Deze vindt u in Mijn Argeweb"
Where?
A few seconds later I got a new menu item in my administration panel.

To log into my new system I launch PuTTY and directs it to the IP address of my new server. Here is my first login ever:
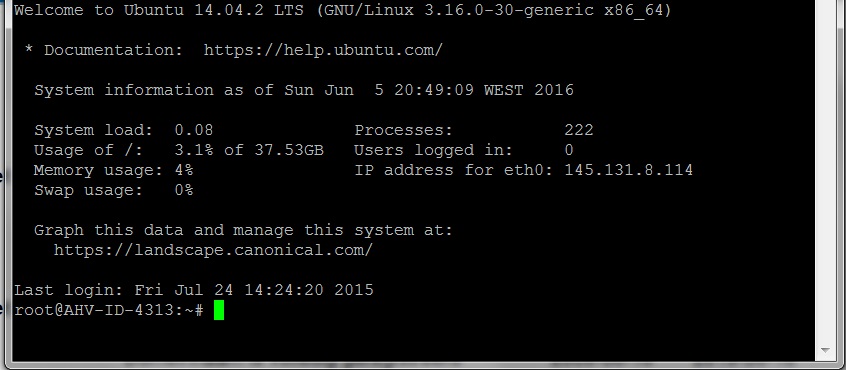
Ehh, what should I do now?
At this point it is a very clean computer. Suppose I start with making one snapshot? But should the server be turned off when making snapshots? Hmm... There was nothing in the documentation saying it had to be turned off first so I just went ahead and made it!

Looks nice with that mixed English and Dutch.
Then I try to log into my new server with WinSCP and that also works as I got used to. Flawlessly. So now when I am done with the oh and the ah I figured that the plan from here is to figure out all steps needed to make the server operational and make proper notes of what I did and in what order.
Here below are all steps I took to bring my new vps up to a level where I could start publishing the blog. I wrote this as if someone should be able to make these steps to create such a server. It is very likely that the only person who wants to read this is myself but you never know? So here are all steps for installing the PHP, MySql, Apache on this Ubuntu. The more likely future of this is that I make some kind of install script of this so that if someone wanted a clean empty JensBlog server they could just install it from a script. But perhaps I will never do that. For now I write it for myself. For this list I created a zip archive (for myself) with the necessary files from the development server.
| Step | Task | Commands | Comments |
|---|---|---|---|
| 1 | Update the server | # apt-get update | Following the advice given here: https://www.linode.com/docs/databases/mysql/install-mysql-on-ubuntu-14-04 |
| 2 | # apt-get upgrade | Newer version of /etc/default/grub was available. I decided to use it. | |
| 3 | Install mysql server. | # sudo apt-get install mysql-server | During install provide a very strong complex password for root user. |
| 4 | Harden the mysql server. | # mysql_secure_installation | 1. Kept the already entered password; 2. Removed the anonymous user; 3 Disallowed remote login to root; 4. Remove test database - yes. 5. Reloaded priviliges. |
| 5 | Logged in to mysql | # mysql -u root -p | (For help give h) |
| 6 | While logged into mysql give the following command | create database jensblog; | |
| 7 | While logged into mysql give the following command | use jensblog; | |
| 8 | Copy the creation sql script 'jensblog001.sql' from the zip archive into this location on the server: /usr/local/bin/ | [Drag and drop in WinSCP] | |
| 9 | While logged into mysql give the following command | source /usr/local/bin/jensblog001.sql; | |
| 10 | Check that all tables are created. Use this command in mysql: | show tables; | +--------------------+ | Tables_in_jensblog | +--------------------+ | Category | | CategoryType | | Feedback | | Post | | PostCategory | | PostURL | | URL | +--------------------+ 7 rows in set (0.00 sec) |
| 11 | Check if perl was installed. | # perl -v | This command said perl was installed so that was fine. If not installed I had to install it here. |
| 12 | Copy 'analyze.pl' to /usr/local/bin from the zip | This is the perl program importing the blog. | |
| 13 | Create jensblog as /usr/local/bin/jensblog | This is the location of the old BlogEngine.NET files. | |
| 14 | Copy the old blog engine files to the jensblog directory created in the previous step. | ||
| 15 | # apt-get install libxml-libxml-perl | ||
| 16 | # apt-get install libdbd-mysql-perl | ||
| 17 | # apt-get install libswitch-perl | ||
| 18 | # apt-get install liburi-encode-perl | ||
| 19 | # apt-get install libhtml-parser-perl | ||
| 20 | # apt-get install apache2 | Set up the webserver Apache2. | |
| 21 | In /var/www create new directory jensblog | ||
| 22 | in jensblog create public_html | ||
| 23 | Create a file post.php in this directory with the content as given in the comment to the right. | ||
| 24 | Set permission of www | # chmod -R 755 /var/www | |
| 25 | Log in to your dns administration console and create a test domain | This is only necessary if you already got a domain that you would not like to take down until your configurations has finished. For example www2.malmgren.nl. Later you can remove www2 with the final domain. | |
| 26 | Creating www2.malmgren.nl.conf in /etc/apache2/sites-available | Copy and modify from provided zip archive. | |
| 27 | Create directory log in /var/www/jensblog | ||
| 28 | Enable your test site. | # a2ensite www2.malmgren.nl.conf | |
| 29 | Restart the webserver. | # service apache2 reload | |
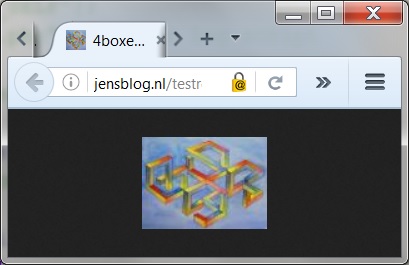
| 30 | Enter the domain name of your test site. In my case it is www2.malmgren.nl Check if the test document will display | If it displays then you are on track. | |
| 31 | Enable the Apache2 rewrite rule engine. | # a2enmod rewrite | This makes it possible to change requested URLs on the fly. |
| 32 | Install php | # apt-get install php5 libapache2-mod-php5 php5-mcrypt | |
| 33 | Restart the webserver. | # service apache2 restart | |
| 34 | Copy .htaccess from the zip archive and put it in /var/www/jensblog/public_html | ||
| 35 | Copy rewrite_test.php into /var/www/jensblog/public_html and rename it to post.php | Rename rewrite_test.php into post.php | |
| 36 | Test the site. Enter www2.malmgren.nl | If the site replies: Test Args No valid args All is fine. |
|
| 37 | Copy all files from the BlogEngine directory into /var/www/jensblog/public_html | ||
| 38 | In dbconnection.php set the correct password to the database | ||
| 39 | # apt-get install php5-mysql | Install modules in php to create a connection between php5 and MySql | |
| 40 | # service apache2 restart | ||
| 41 | Set analyze.pl to executable | # chmod o+x /usr/local/bin/analyze.pl | |
| 42 | Set correct password for the database in analyze.pl | ||
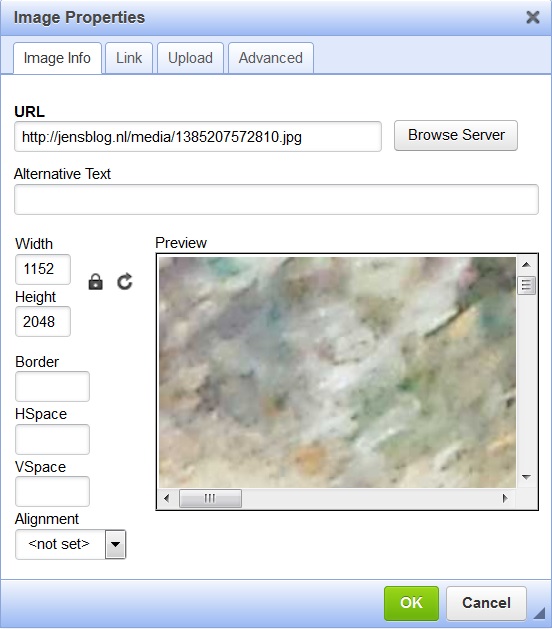
| 43 | Create folder media in /var/www/jensblog/public_html | The analyze.pl tool downloads fotos to the media directory. | |
| 44 | Now run analyze.pl to import the previous blog to the new blogengine. | analyze.pl | Note to self: Develop an alternative program setting up an empty blog. |
| 45 | In these files change $domain = "…" to the correct domain. For example www2.malmgren.nl | domain.php | Note to self: It should only be necessary to change the domain in domain.php |
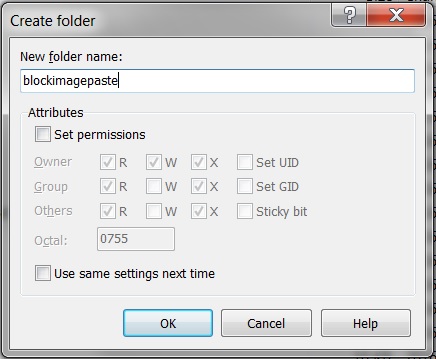
| 46 | Create folder images in /var/www/jensblog/public_html | ||
| 47 | Copy the files in the zip archive Images to the images directory. | ||
| 48 | Create folder ckeditor in Create folder images in /var/www/jensblog/public_html | ||
| 49 | Copy the files in the zip archive CkEditor to the ckeditor directory. | ||
| 50 | Make www-data user the owner of the media folder. | # chown www-data:www-data /var/www/jensblog/public_html/media | |
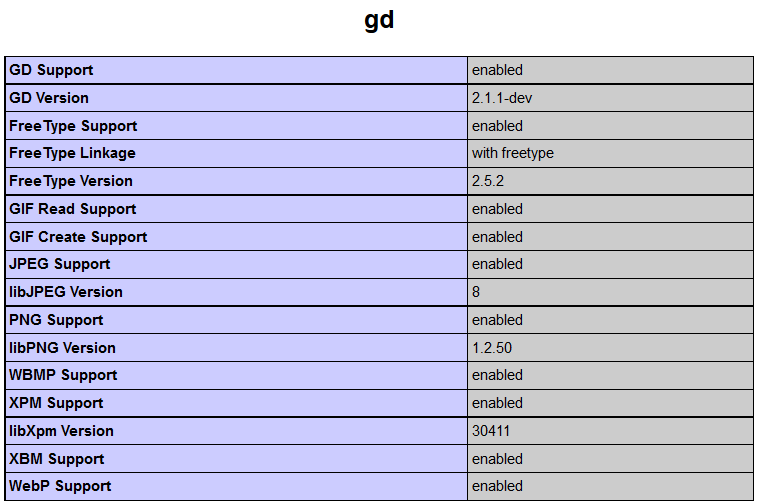
| 51 | # apt-get install php5-gd | ||
| 52 | # service apache2 restart |
When I was done with this I started using my temporary server and at first I noticed nothing but as I went editing pages they got destroyed. This was really annoying. Long story short html tags would get zapped upon opening a post for editing and it was settings in the CkEditor causing this behavior. Rather the greater than and less than symbols in pairs would get zapped.
So I studied this and it has taken me a lot of research to find out what this is about. The CKEditor makers wants to make a WYSIWYG editor. People writing about html code are "out of luck" when using the CKEditor. Well, no there are solutions but I don't get them to work. I am clearly not clever enough. I gave up on that.
So I made my own solution for this little issue. This solution is based on these two wonderful characters:
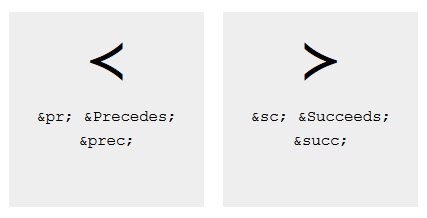
I found them here at this site: https://dev.w3.org/html5/html-author/charref
Here I am going to tell you how I solved this but it is a little bit like talking about Voldemort (the one that you must not mention in the Harry Potter books) while you are next to him. But please enjoy!
So suppose we have a character that looks like less-than and greater-than but they aren't? In my routine loading data from the database I made sure that all text within pre start and end tags are changed into the prec and succ characters. The text is loaded in CKEditor and it survives the WYSIWYG zapping tag routine.
So when that worked I could get literal less-than and greater-than characters within pre tags to survive the zapping. This was the first step. I was delighted. Then what happened if I pasted html sourcecode into the CKEditor? These would come escaped as ampersand+lt+semicolon and ampersand+gt+semicolon so they would be safe when reloaded into the editor. NO! So when I made also these codes into prec and succ characters then pasted html source code would survive as well.
So are we done then? No, when people would browse my site they would see something that looks like html source code but it would not work if it was copied and pasted into an editor. So for this issue the line numbering routine was changed so that if it was seeing the prec and succ it would turn them into real greater-than and less-than characters.
Then it worked!
Now it is time for a little issue. Do you remember that my old blog could not edit any more categories and that I could not add for example 2016. Well now I can do that but it is a little tedious to go and do it manually for all posts published this year. So there is a remedy for that! A sql query obviously.
mysql≻ use jensblog
Database changed
mysql≻ start transaction;
Query OK, 0 rows affected (0.00 sec)

mysql≻ insert PostCategory (PostID, CategoryID) select Post.ID, 47 from Post where PublishedOn ≻ '2016-01-01';
Query OK, 14 rows affected (0.00 sec)
Records: 14  Duplicates: 0  Warnings: 0

mysql≻ select * from PostCategory where CategoryID = 47;
+--------+------------+
| PostID | CategoryID |
+--------+------------+
|     41 |         47 |
|     47 |         47 |
|    126 |         47 |
|    133 |         47 |
|    155 |         47 |
|    176 |         47 |
|    191 |         47 |
|    258 |         47 |
|    276 |         47 |
|    437 |         47 |
|    440 |         47 |
|    459 |         47 |
|    464 |         47 |
|    466 |         47 |
+--------+------------+
14 rows in set (0.00 sec)

mysql≻ commit;
Query OK, 0 rows affected (0.00 sec)

mysql≻
Wonderful. Now I am ready to go on to the next challenge of the deployment, redirections.
But that is for the next time.
 Sounds in the blogsystemNext version of the slideshowLearning Python Part IIILearning Python Part IIImpressionism and beyond. A Wonderful Journey 28 January 2018Fixing unresolved links after editingThis is my summer 2016 blog!Porting my blog for the second time, linksPorting my blog for the second time, editing part 7Porting my blog for the second time, editing part 6Porting my blog for the second time, categories part 3Business cards, version 1Porting my blog for the second time, deployment part 2Not indexed but still missing? Google hypocrisy.A new era: Nikon D5100 DSLR, Nikkor 18 - 55 and 55 - 300!
 I moved from Sweden to The Netherlands in 1995.
Here on this site, you find my creations because that is what I do. I create.